Wednesday, June 15, 2011

Boating Safety Tips

Download Here

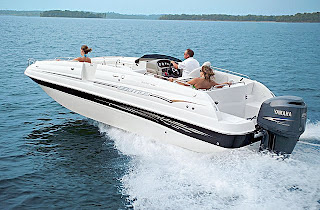
There’s no mystery to boating safety. Understanding and obeying navigational rules and safety procedures is proven to save lives while reducing injuries and property damage ACE’s Top Ten Recreational Boating Safety Tips 1. Always wear a life jacket and insist that your crew and guests do the same. 2. Never drink alco** while boating. 5. Understand and obey boating safety recommendations and navigational rules…..Imagine the mayhem that would result if car drivers disregarded highway traffic laws. Know and understandboating safety procedures and rules of navigation before taking to the water, and practice them without fail…
https://blogger.googleusercontent.com/img/b/R29vZ2xl/AVvXsEhnP1HXa3-4SD8oG1lF7Cq2RGbLQKVoAFdYyXDCreQudbdC3nSH3tUZh3I83zZkCngTS2ULsLCWTJMWpBP-E11QuSoTV4337MCxq4l6rYK6vR-2vgNS24aRSe6lpuD5_tz8UpYAf9ODHUw/s320/ski-and-wakeboard-boat-deck-boat-76790.jpg

Monday, June 6, 2011

Workshop Manual for Volvo Penta MD6A/MD7A

Download Here
This workshop manual contains technical data, descriptions and repair instructions for Volvo Penta products or product versions contained in the contents list. Ensure that the correct workshop literature is being
used. Read the safety information and the Workshop Manual “General Information” and “Repair Instructions” carefully before starting work…

Installation Manual Electromaax “Aquamaax” marine high-output alternator

DownloaD Here
PM-Series (2” Pad Mount) Series: Small case. Replaces Korean (Mando type) alternators using dual 2” static pad mounting feet. (Found on many Mercruiser and Volvo Penta gas engines.) Once you have determined that the new alternator is the correct replacement for your existing model: 1. Disconnect the batteries and/or turn the switch to the “OFF” setting. Disconnect the wiring from the existing alternator. 2. Loosen the mounting & tensioning bolts and remove the existing alternator. ….6. Connect the output cable (see cable sizing recommendations below) ground, field wire, stator (tach) wire if needed and other necessary wiring. Connect alternator to regulator wiring harness as indicated in wiring diagram included the alternator’s positive and ground cables should be sized according to the chart on Page 3. 7. If a new regulator is being installed along with the alternator, complete its wiring installation according to the instructions included with your regulator

Electrical Equipment for Yachts, Boats and Motor Homes

Download Here
AC MARINE DIESEL GENERATORS Entec West Marine Diesel Generator The Entec West EW4200D/EW3500D is the result of over 35 years experience in field installation, service, and customer suggestions. It is powered by a single cylinder, high power to weight ratio, Farymann Diesel engine. The engine has a roller bearing supported crankshaft and a ball bearing supported camshaft. It can be hand crank started in an emergency. The fresh water cooling system cools the engine cylinder, cylinder head, the oil cooler, and the generator. The fresh water to sea water heat exchanger prevents sea water from contaminating the engine and generator. The unit does not require any outside air for cooling.

Teleflex HC4645H Compact Outboard Cylinder Application Guide

 Download Here
BayStar Outboard Compact Cylinder Application Guide (Cylinders HC4645H/47H/48H/58H) Teleflex HC4645H Compact Outboard Cylinder Application Guide….

1. Requires Spacer kit part # HO5090 2. Engine clamp brackets must be cut or ground, and the engine through bolted onto the transom, or interference will occur, restricting engine trim and tilt. 3. Steering hook Yamaha Part # 63D-48511-00-4D must be installed 4. Cylinder HC4645 may be used in these applications. The pivot plate will need to be flipped before installation. Instructions provided with Owner’s Manual. 5. Johnson 115 HP 2-Stroke engines, require the pivot plate to be flipped. See Note #4. YANMAR…

the Teleflex BayStar HK4200a Hydraulic Steering system

Download Here
INTRODUCTION BayStar hydraulic steering is brought to you by the manufacturers of SeaStar®, the most trusted name in pleasure boat steering. BayStar allows you to install all of the safety, reliability and comfort of hydraulic steering onto your boats rated to a MAXIMUM of 150 HP (total). Combine this with the superior Teleflex Canada design team, rigid ISO quality control and teamed with the finest materials and precision manufacturing—BayStar continues the tradition bringing comfort and safety to boating. Manufactured in the tradition of the whole SeaStar® family of products—for applications that exceed BayStar’s HP rating please purchase one of our SeaStar® products. Overview With mechanical steering you sacrifice a degree of comfort, and traditional hydraulic systems may be more than is needed on lower horsepower engines.

Hydraulic Steering for Outboard Powered Vessels

Download Here
INSTALLATION AND OWNERS MANUAL

BEFORE OPERATING YOUR BOAT Ensure that the following check list is carried out 1 Perform system pressure test by turning helm to hard over and then an additional 1/4 to 1/2 of a turn. This will pressurize this side of the system. Check all fittings and seals for leaks and repeat the process in the opposite direction. Repair or replace any leaking component prior to operating vessel. 2 Test the steering system. Complete two (2) full cycles with the engine being taken from hard over to hard over in both the fully tilted DOWN and fully tilted UP positions. During this operation inspect ALLmoving components to ensure that no interference or restriction of mechanical components is present through the full range of travel including: NOinterference between cylinder, drag link, fasteners, engine cowling, tie-bar, transom, adjustable engine lift plates, splashwell or other surfaces; NO stretching, crushing, or restriction of movement of hydraulic lines, kinking or chafing of lines against bulkhead/splashwell entry points or any other contact points. •Confirm that there is no interference between the steering cylinder and the transom, splashwell or jackplate or any positional combination of these parts by performing these simple steps: •Fully trim and tilt engine and turn steering from hard over to hard over while checking for interference at all positions. (If interference occurs it must be eliminated prior to operating vessel.) •Confirm that the steering cylinder can be stroked fully in both directions as well as fill tilt and trim without stretching and/or kinking the hydraulic tube/hose. •Confirm that the hydraulic tubing /hose is not subject to chaffing, kinking, pinching or stretching. • Stretched, kinked or chafed tubing/hose will fail over a period of time. CYLINDER # OF A B C MIN. ENGINE MODEL NUMBER ENGINES CENTER DISTANCE HC4600H 1 32″ (813mm) 5″ (127mm) 4″ (102mm) N/A 2 Twin engine applications not available at this time HC4645/47H/ 1 21″ (534mm) 6″ (153mm) 5″ (127mm) N/A 48H/58H 2 Twin engine applications not available at this time NOTES: i)

Free owners manual GDL 30/30A marine weather satellite receiver

 Download Here
This manual covers the XM weather and audio features of the GDL 30/30A when viewed on the Garmin Marine Network chartplotters. To get the most out of your new system, take the time to go through this manual and learn the operating procedures. This manual discusses in detail how to install the GDL 30/30A and how to subscribe to XM WX Weather and Radio services. Detailed information about the GDL’s Weather and Audio features and operation is also provided. For all other unit operating instructions, refer to your Garmin Chartplotter’s Owner’s Manual and Quick Reference Guide. Product terminology used throughout this manual • This manual refers to the GDL 30 Marine Weather Satellite Receiver as GDL 30 and the GDL 30A Marine Weather/Audio Satellite Receiver as GDL 30A. It covers instructions for both units (GDL 30/30A). Unless otherwise specified, unit operations are the same on both models. • Garmin Marine Network Chartplotters are Multi-Function Display units such as the GPSMAP 3005C, and GPSMAP 3006C/3010C. They are referred to as chartplotters throughout this manual…. 2 GDL 30/30A Owner’s Manual INSTALLING THE GDL 30/30A To obtain the best possible performance, install the GDL 30/30A according to the following instructions. If you experience difficulty during the installation, contact Garmin Product Support or seek the advice or a professional installer. Mounting the GDL 30/30A Mount the GDL 30/30A in a location that is dry and well-ventilated. Avoid mounting the unit where it may become submerged or exposed to extreme temperatures. Verify there is enough clearance to attach the cables to the unit. If you want to view the blink codes, make sure the Status LED is visible. To mount the GDL 30/30A: 1. Using the unit as a template, mark the location of the mounting holes. If needed, additional holes can be drilled in the side mounting flanges. 2. Secure the GDL 30/30A using the appropriate fasteners. Connecting the Power Cable The Power Cable can be connected directly to the vessel’s battery or through an open connector on the fuse block.

Boatmad Workshop Manual For Drives 280, 285, 290

 Download Here
The Drive Designations and Series Number (PZ-No.) can be found on the product plate. Please always include both the drive designation and the PZ number in all correspondence. The Workshop Manual is primarily produced for Volvo Penta service workshops and their qualified personnel. It is therefore assumed that persons using this manual have a basic knowledge of marine drive systems, and can perform the relevant work of a mechanical and electrical nature. Volvo Penta continuously develops its products, and therefore reserves the right to introduce modifications.All the information in this manual is based on product data available prior to publication.

Sunday, June 5, 2011

Luxury Yacht (Integrated Luxeon LEDs Enable Unique Lighting)

 Download Here
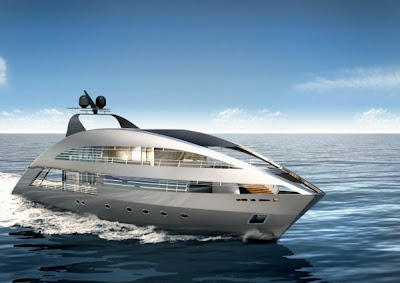
Lumileds’ Luxeon light sources have been used by lighting manufacturer Light Graphix, in a project to light the luxury £14 million, 140 foot sailing yacht Gimlä. Designed by Dubois Naval Architects, with interior design by Dick Young and built by premier Dutch yard Vitters, the yacht required a flexible, energy efficient lighting solution that would perform in all weather conditions and in the most difficult sailing situations. In addition, the lighting needed to create a stylish environment, to reflect the luxury standards of the yacht. To meet this brief Light Graphix, a Luxeon Certified Luminaire Manufacturer, created lighting solutions using Luxeon LEDs for deck and step lighting, and for highlighting key design features on board Gimlä.
https://blogger.googleusercontent.com/img/b/R29vZ2xl/AVvXsEhdI_pBNWvTIc_uOX0wnm511cHQH9beERTVLLqSxor4yrOUVf6aR20ba1MF3gL3qDc5SL8uU-X-HJuoyez7r7bdX08wiZ53x1QG2CAsdsG_6s_rW5yPYLeK9Y0ahuWbuuk-uyRjHvIBBg0/s400/Signature+luxury+yacht+yachtplus.jpg

Honda BF225A Owner’s Manual

 Download Here
Refuel With Care OUTBOARD MOTOR SAFETY Exhaust gas contains poisonous carbon monoxide. Avoid inhalation of exhaust gas. Never run the engine in a closed garage or confined area. Gasoline is extremely flammable, and gasoline vapor can explode. Refuel outdoors, in a well- ventilated area, with the engine stopped. Never smoke near gasoline, and keep other flames and sparks away. Refuel carefully to avoid spilling fuel. Avoid overfilling the fuel tank. After refueling, tighten the filler cap securely. If any fuel is spilled, make sure the area is dry before starting the engine